
Background
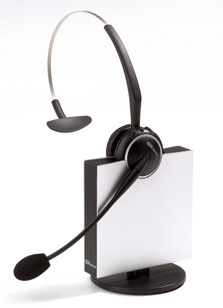
For some time now I have been looking for a Jabra A-210 as wireless Bluetooth communications interface to an Amateur radio transceiver.
The Jabra A210 does pop up on ebay, mostly in the US. When they do, they are snapped up quickly.
There are alternatives ranging in price from $60 -100 new and second hand, such as the Jabra/ GN Netcom GN9120 base and headset, which are readily available.
Modifications
Monday, 3rd May, 2010 00:44
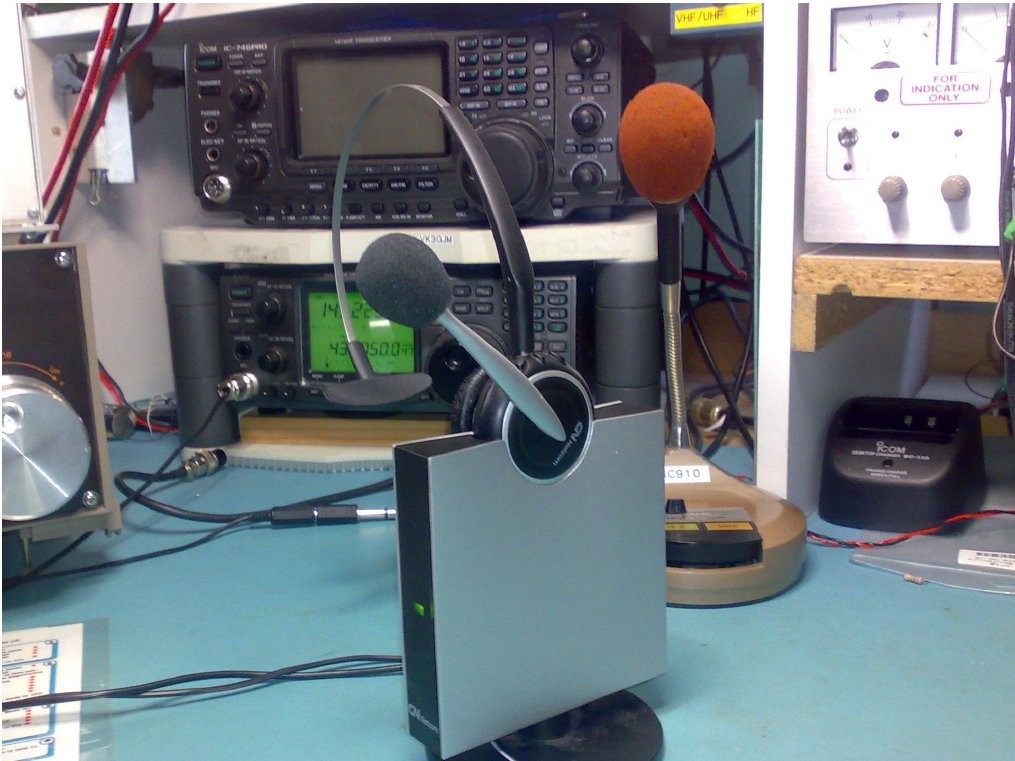
Converting the GN9120 for Ham Radio Use
Removing 2 parts and the inclusion of only 5 passive parts, cable and 2 connectors turns the GN9120 into a Bluetooth Wireless headset interface that can be coupled to almost any Amateur radio transceiver in a couple of hours.
Another nice feature of the GN9120 is that it operates from 7.5 volts DC, therefore a small 1 amp 8 volt regulator with a series diode allows the operator to run the GN9120 from 13.8vdc.
The GN9120 headset is charged on the base unit/stand, so when not required, you place the headset on the base stand and it charges the headset while you have a break.
The headset was charged over night and it ran all day during my initial experiment, achieving distance results of 30 metres from the shack.
With most products, there are some pros and cons. Below are the ones I picked up:
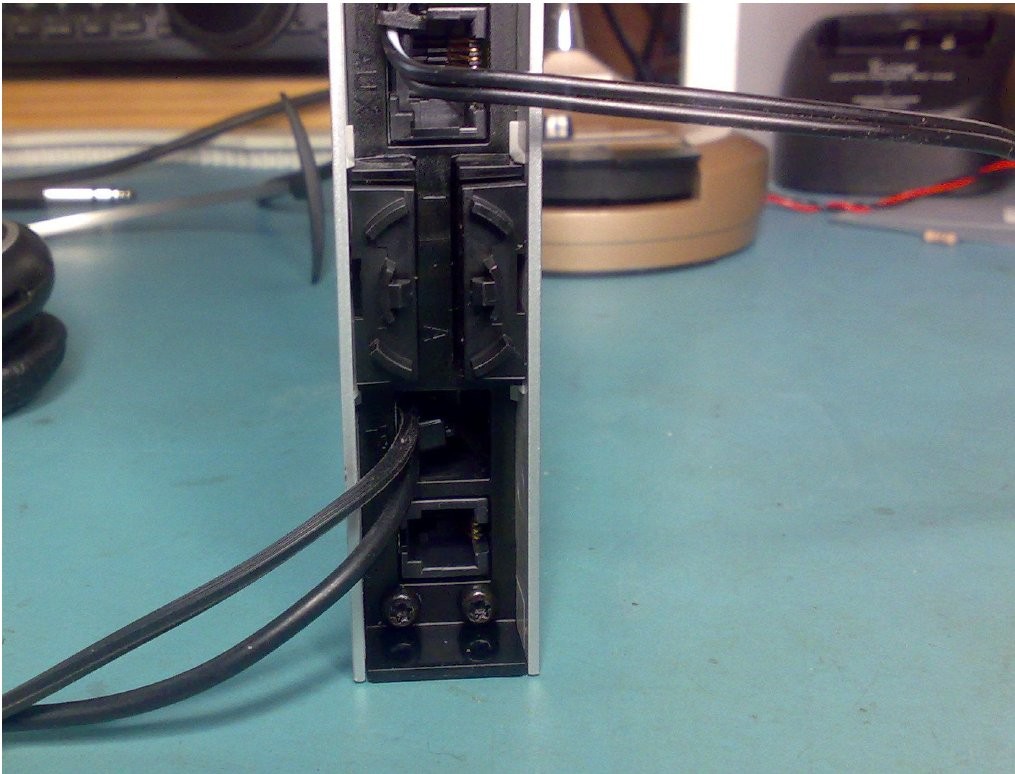
Remove RJ6
By Gerald Molenkamp VK3GJM
| Qty | Part |
| 1 | 3.5mm speaker plug |
| 2 | Lengths of shielded single core cables |
| 1 | Radio Mic plug, suits transceiver |
| 2 | 10uF 6 - 16 volt Electrolytic |
| 1 | 1K resistor |
| 1 | 390r resistor |
Parts List
The following parts are required for the modifications:
The following parts are required for the modifications:
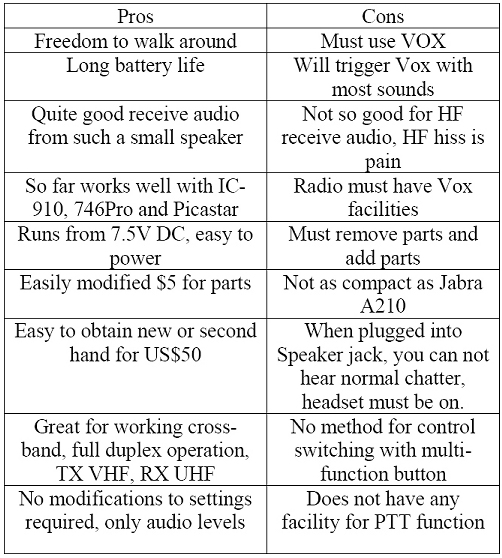
Remove 2 Isolation Transformers
Picture 1, GN9120 PCB with Plastic Casing Removed
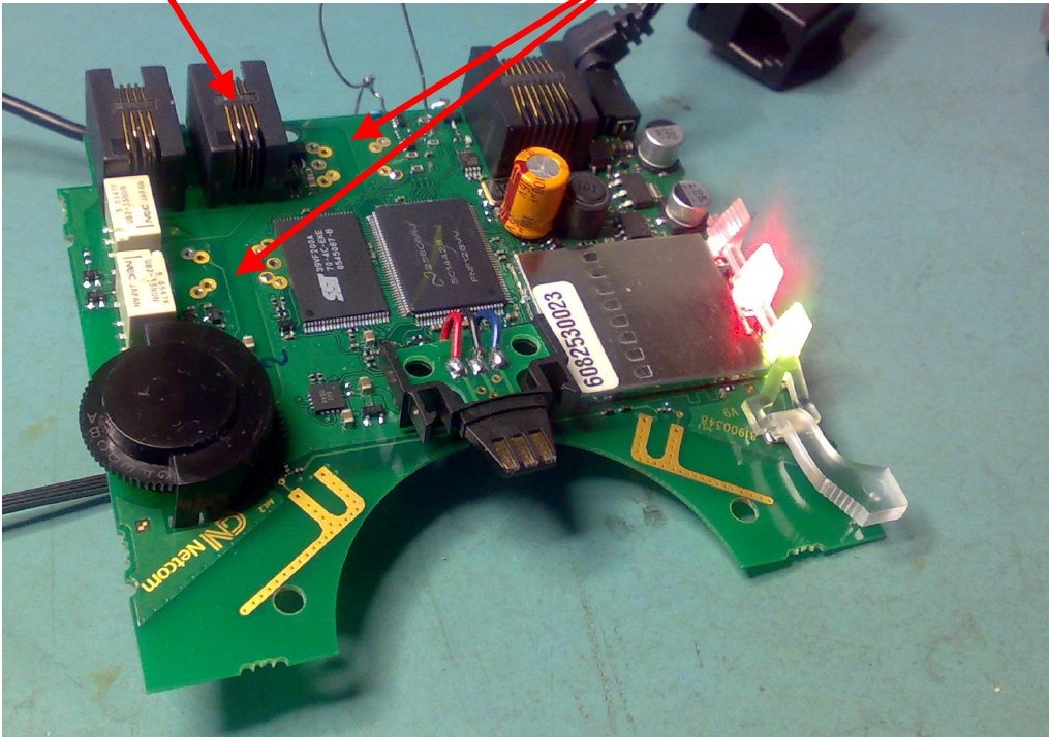
Picture 2, Strain Relief Cable
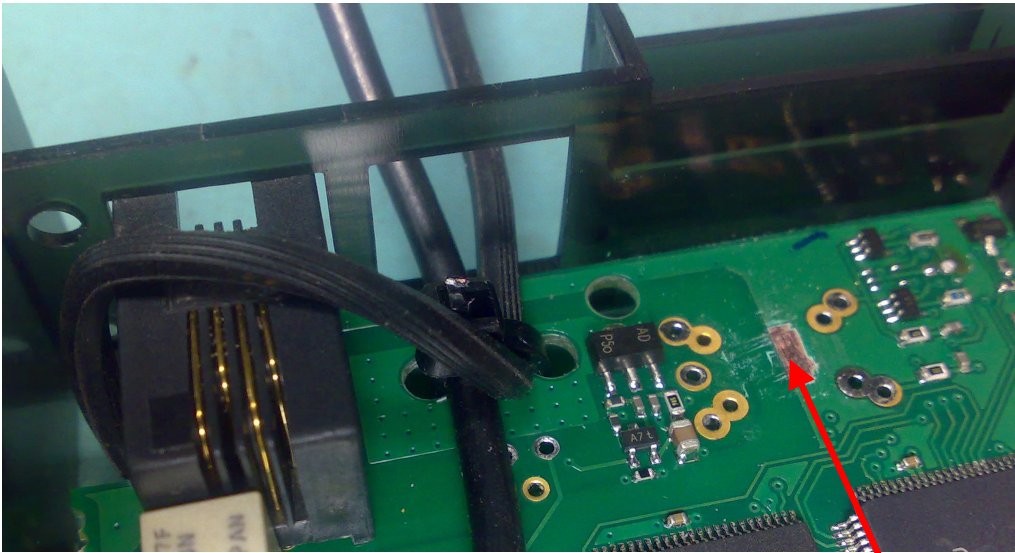
Scrape away some mask and expose Copper Ground
If you remove one of the 2 housing from the PCB, 2 cables each single core shielded can exit the housing and a small 100mm cable tie via 2 PCB holes provides strain relief.
One cable needs terminating on the opposite side and the other on this side of the PCB.
One cable needs terminating on the opposite side and the other on this side of the PCB.
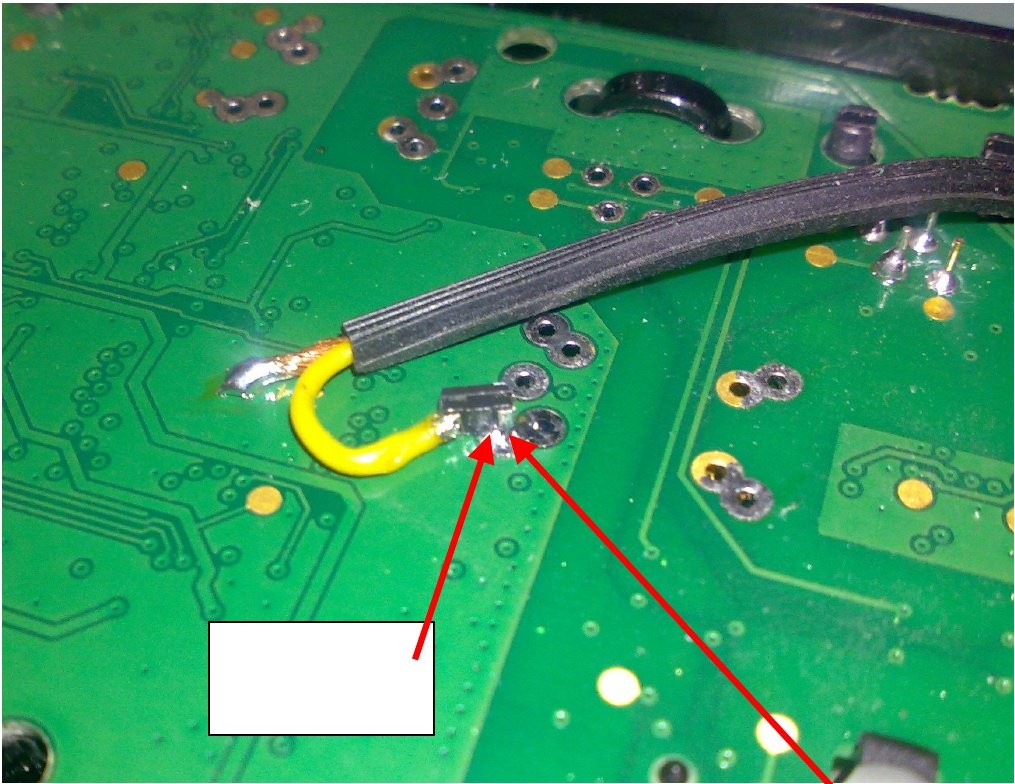
Solder Point "B"
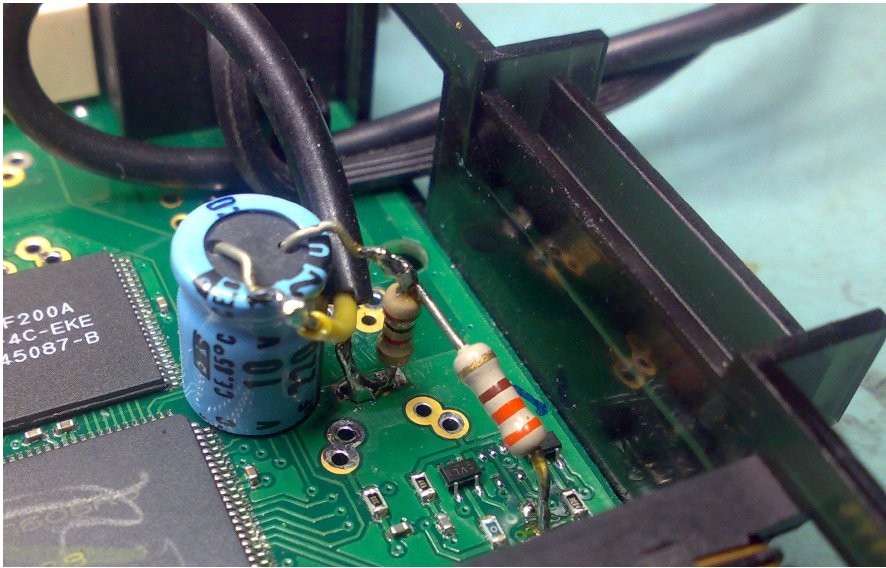
Picture 3, Receiver audio connection via 100uF 6V Tantalum.
The receiver's audio out, generally via the speaker or phones jack is to be connected to this spot, positive to GN9120.
Picture 4, Microphone connection
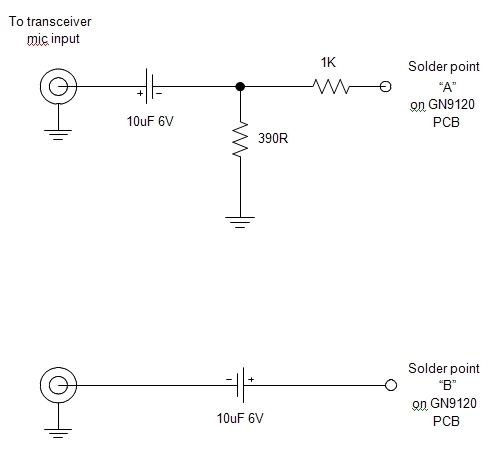
Figure 1, Interface circuit
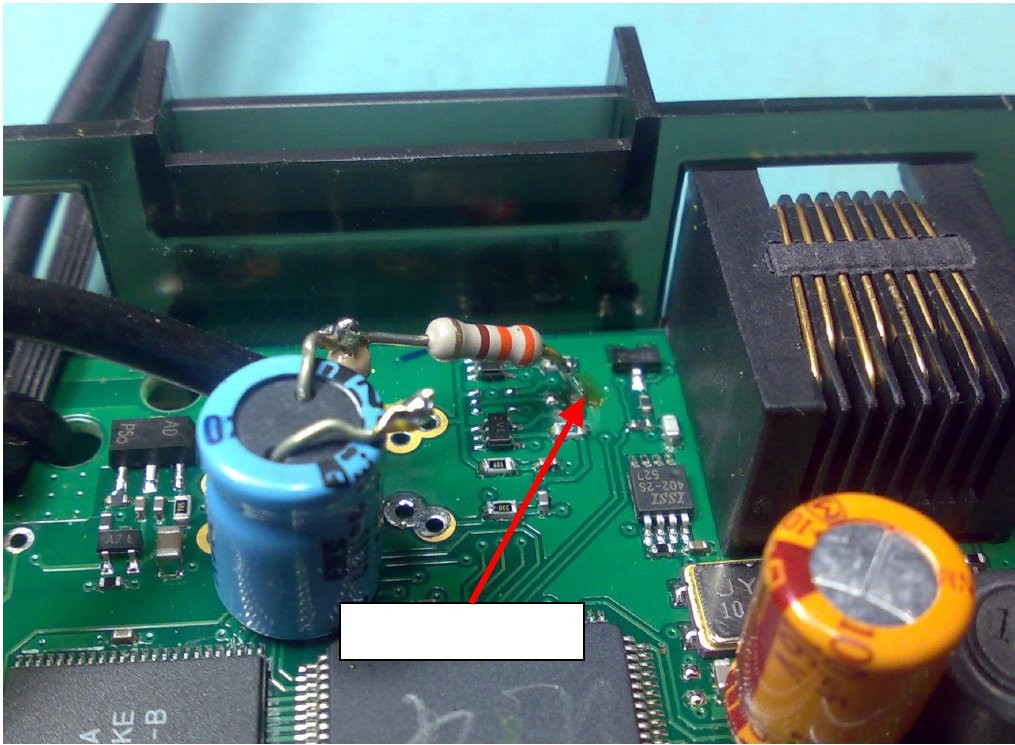
Picture 5, Mic Audio solder point
Picture 6, GN9120 assembled, ready to go.
Picture 7, Mic and speaker cable exiting GN9120
This basic instruction was offered as a all care no responsibility mod. People wishing to modify their GN9120 or radio do so at their own risk.
Good luck, hope to hear you on the air soon.
73s and regards
Gerald
VK3GJM
Good luck, hope to hear you on the air soon.
73s and regards
Gerald
VK3GJM
Disclaimer
Solder point "A"

1.75 Mbytes
Update
I have updated my GN9120 to include the PTT modification described in Ben VK3KBC's article. Check it out at the bottom of that page.
GN9120 Wireless Bluetooth Interface for Amateur Radio

Search
